
Your SINGER S0605 Overlocker
Singer's instructions rewritten in plain English, with every setting kept exactly as Singer intended, and with tips from our team added along the way. Stuck on something? Ask the Live Sewing Advisor at any point.
This manual applies to UK spec machines.
Main things to know
Getting to know your machine
Important safety instructions
When using an electrical appliance, basic safety precautions should always be followed, including the ones below. Read all the instructions before using this machine.
Keep these instructions somewhere handy, close to the machine, and pass them on if the machine is ever given to someone else.
This machine is intended for use by adults. Children aged 8 to 12, and people with reduced physical, sensory or mental capabilities or without experience and knowledge, may use it with adult supervision, as long as they have been shown how to use it safely and understand the hazards involved. Cleaning and user maintenance must not be done by children without supervision. Nobody should play with the machine. Children under 8 must not use the machine.
DANGER - to reduce the risk of electric shock
- Never leave the machine unattended while it is plugged in. The socket it is plugged into should be easy to reach. Always unplug the machine straight after use, and before cleaning, removing covers, oiling or making any other adjustment mentioned in this manual.
WARNING - to reduce the risk of burns, fire, electric shock or injury
- Do not let the machine be used as a toy. Take close care when it is used by or near children.
- Only use the machine for its intended purpose, as described in this manual. Only use attachments recommended by the manufacturer, as listed in this manual.
- Never use the machine if the cord or plug is damaged, if it is not working properly, or if it has been dropped, damaged or dropped into water. Take it to your nearest authorised dealer or service centre to be examined, repaired or adjusted, electrically or mechanically.
- Never use the machine with any of its air openings blocked. Keep the ventilation openings of the machine and the foot control free from lint, dust and loose cloth.
- Keep your fingers away from all moving parts. Take special care around the needles.
- Always use the correct needle plate. The wrong plate can cause the needle to break.
- Do not use bent needles.
- Do not pull or push the fabric while sewing. It can bend the needle and make it break.
- Wear safety glasses.
- Turn the power switch to O (off) when making any adjustments in the needle area - threading, changing a needle, changing the presser foot and so on.
- Never drop or insert any object into any opening.
- Do not use outdoors.
- Do not use where aerosol (spray) products are being used or where oxygen is being given.
- To disconnect, turn all controls to off (O), then take the plug out of the socket.
- Do not unplug by pulling the cord. Hold the plug, not the cord.
- The foot control is used to run the machine. Never put anything else on the foot control.
- Do not use the machine if it is wet.
- If the LED light is damaged or broken, it must be replaced by the manufacturer, its service agent or a similarly qualified person, to avoid a hazard.
- If the cord fixed to the foot control is damaged, it must be replaced by the manufacturer, its service agent or a similarly qualified person, to avoid a hazard.
- Only use the foot control supplied with the machine, or one supplied by an approved SINGER retailer. Only use the cords supplied with your machine; if one is damaged or lost, replace it with an identical part, fitted by the manufacturer, its service agent or a similarly qualified person.
- Overlockers: never use the machine without the cutter cover in place.
- CAUTION - the machine has moving parts. To reduce the risk of injury, switch off before doing any servicing or maintenance, and close the cover before using the machine.
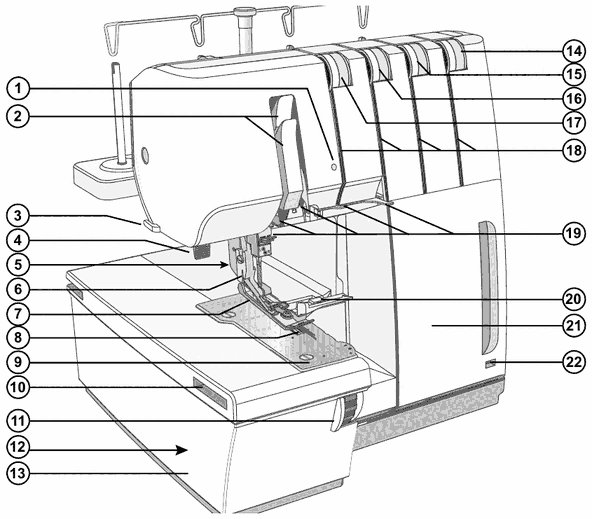
Front and side of the machine
- Safety indicator light
- Threading paths
- Thread cutter
- Presser foot lifter
- Presser foot release button
- Presser foot ankle
- Presser foot
- Feed teeth
- Needle plate
- Slots for attaching the extension table (optional accessory)
- Cutting width dial
- Upper cutter position knob (behind the flat bed extension)
- Flat bed extension
- Lower looper thread tension dial (green)
- Upper looper thread tension dial (red)
- Right needle thread tension dial (blue)
- Left needle thread tension dial (orange)
- Threading slots
- Thread guides
- Cutting width indicator
- Front cover
- Slot for attaching the waste tray
Inside and back of the machine
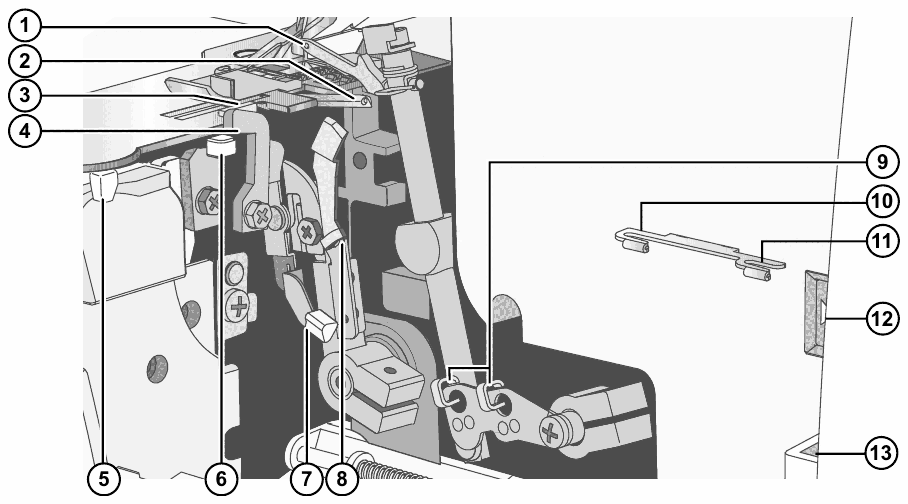
Inside the machine (front cover open)
- Upper looper
- Lower looper
- Stationary cutter
- Upper cutter
- Precise Thread Control lever
- Stitch finger lever
- Lower looper threader
- Lower looper thread guide
- Upper/lower looper thread guides
- Upper looper thread guide
- Lower looper thread guide
- Threading position indicator
- Pincushion
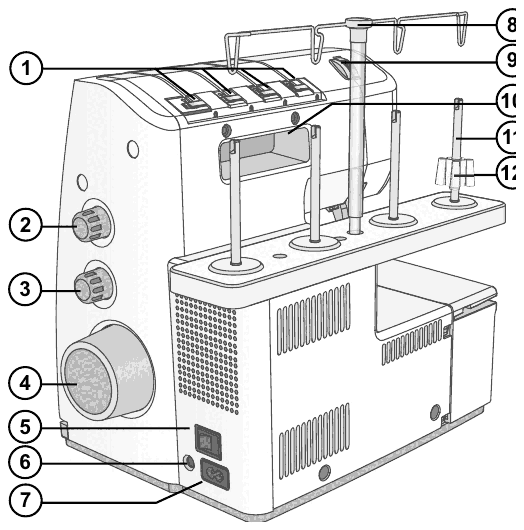
Back of the machine
- Pre-tension thread guides - lower looper, upper looper and needle thread guides
- Stitch length dial
- Differential feed dial
- Handwheel
- Power switch
- Foot control socket
- Power cord socket
- Telescopic thread stand
- Presser foot pressure adjustment dial
- Handle
- Spool stand and spool pins
- Cone holders
Needle area
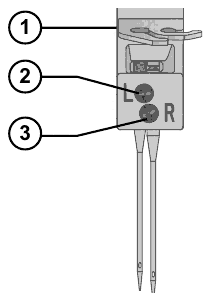
- Needle thread guide
- Left needle
- Right needle
Accessories
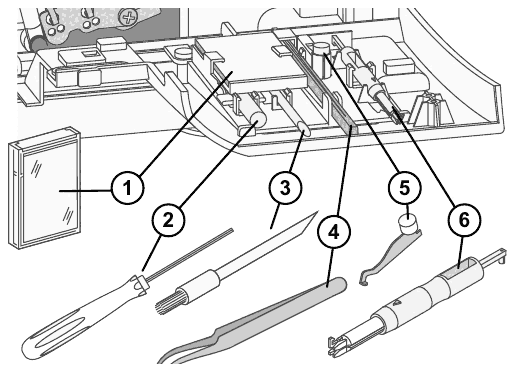
Stored in the front cover
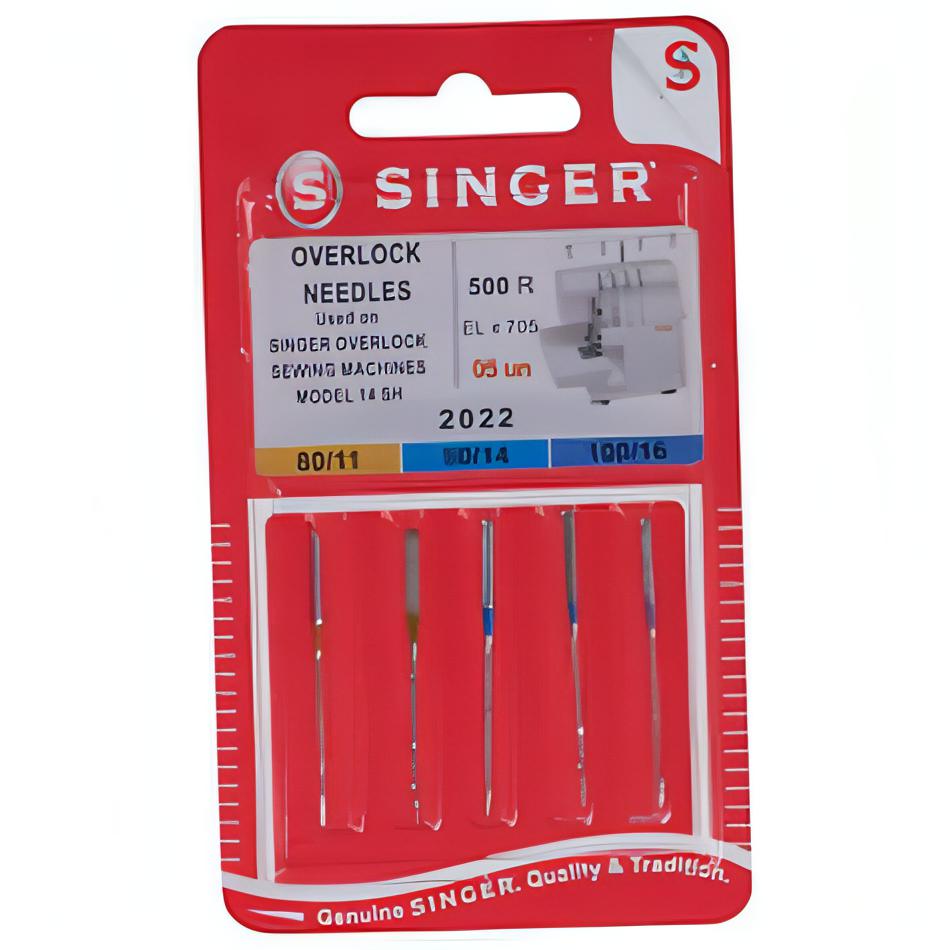
- Needle pack
- Allen key
- Brush
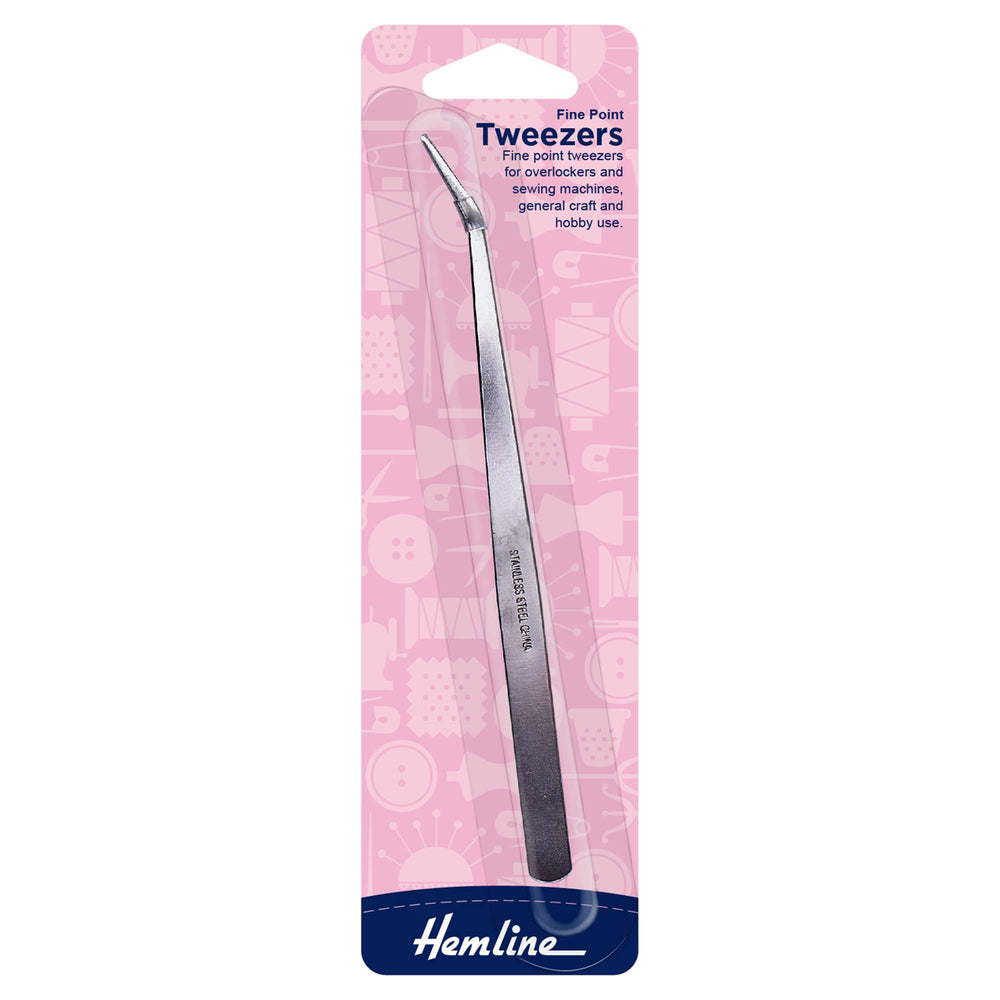
- Tweezers
- Upper looper converter
- Needle threader
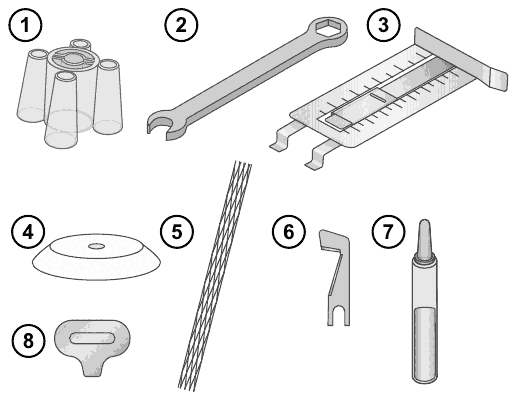
Other accessories
- Cone holders x 4
- Spanner
- Seam guide
- Spool caps x 4
- Thread nets x 4
- Knife blade for the upper cutter
- Oil
- Screwdriver
- Accessory box (not pictured)
- Foot control (not pictured)
- Waste tray (not pictured)
- Soft dust cover (not pictured)
Optional presser feet are not included.
Unpacking and connecting to the power
Lift the machine out of the box and remove all the packing. Wipe the machine, especially around the needle and needle plate, to remove any oil before sewing.
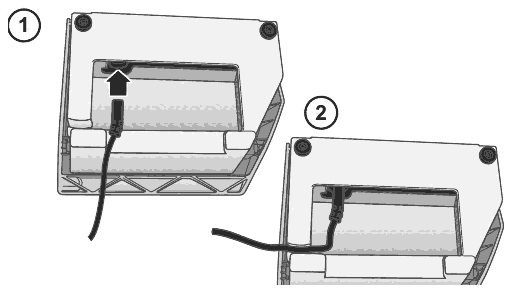
Connecting the foot control cord (first time only)
- Turn the foot control over. Plug the cord into the socket inside the foot control, pushing firmly so it is properly connected.
- Lay the cord in the slot on the underside of the foot control.
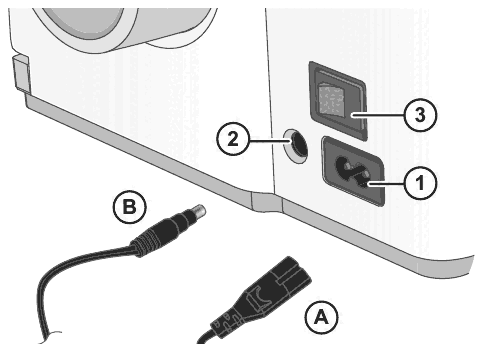
Connecting the foot control and power
- Before plugging in, check the voltage matches the plate under the machine.
- Plug the foot control cord (A) into the socket (1) at the bottom right-hand side of the machine.
- Plug the power cord (B) into the power cord socket (2) at the bottom right-hand side of the machine, then into the wall socket.
- Press the ON/OFF switch (3) to I to turn on the power and the light.
Press the foot control to sew - the harder you press, the faster the machine sews. Take your foot off to stop. Press the power switch to O to turn the machine off.
- Only use the foot control supplied with the machine, or one supplied by an approved SINGER retailer.
- Unplug the power cord when the machine is not in use.
- If you are unsure how to connect the machine to the power, ask a qualified electrician.
Useful for this
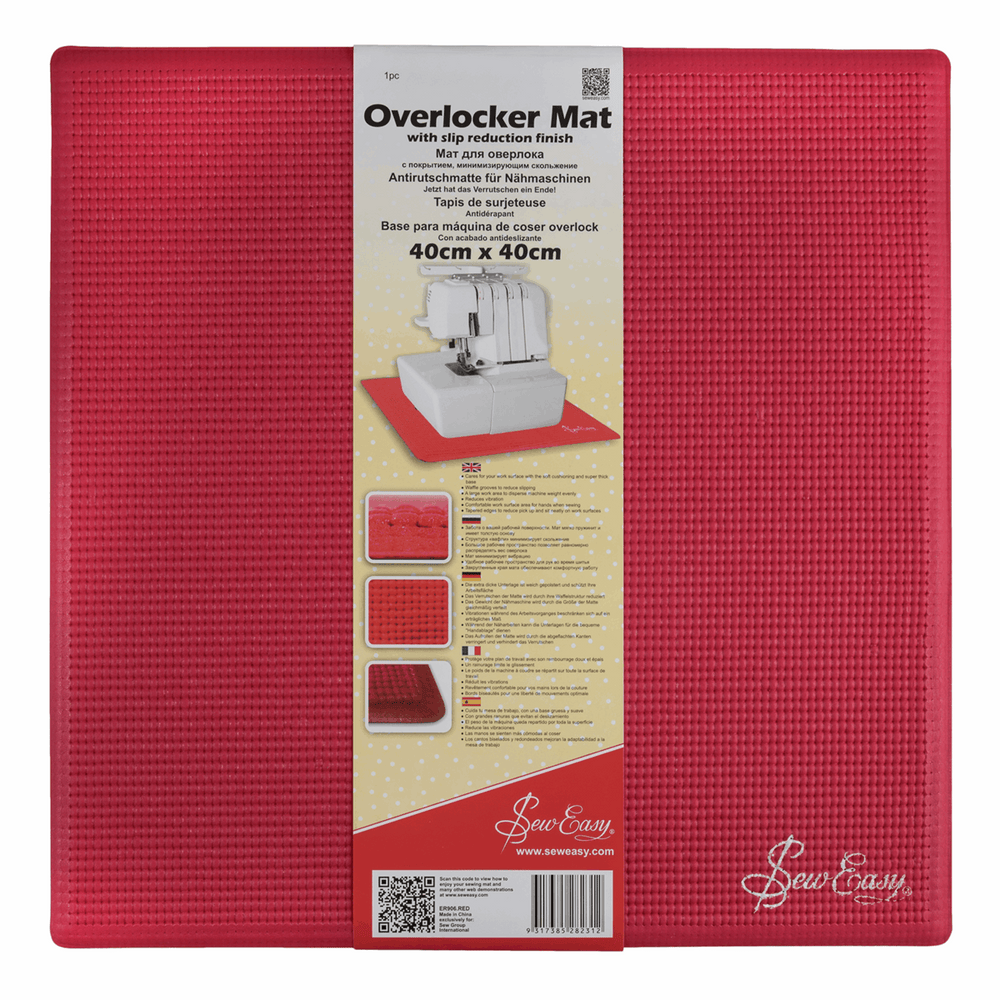 Anti-slip Overlocker Mat£18.99
Setting up
The rest of this manual is for our customers
34 more sections, including step-by-step guides, stitch settings and troubleshooting.
The full manual and our Live Sewing Advisor come free with every machine we sell.
Order a Singer S0605 OverlockerAlready a customer? Log inBought your machine somewhere else? Get the full manual, plus our Live Sewing Advisor for any sewing question, for 30 days.
Get 30 days' access - £10 one-offA one-off payment of £10 for 30 days - no subscription. Instant access by email, including every interactive sewing machine manual we have.